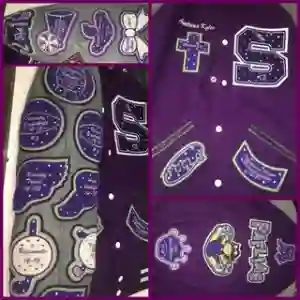
Custom patches have quietly become one of the most versatile branding and self-expression tools around. From military units and motorcycle clubs to small businesses, sports teams, and hobbyist groups, embroidered and printed patches turn a simple piece of fabric into a badge of identity. What used to require a graphic designer, a manufacturer's back-and-forth emails, and weeks of waiting can now be done in an afternoon, thanks to the rise of browser-based design tools that put the entire process in your hands.
If you've ever wanted a patch for your team jacket, your brand's merchandise line, a community group, or just for fun, this guide walks you through everything you need to know about creating one from scratch, without any design experience or expensive software.
Why Custom Patches Are Having a Moment
Patches aren't just decorative anymore. They serve real, practical purposes across industries and communities:
- Brand identity: Small businesses use patches on uniforms, hats, and jackets to build a consistent, professional look.
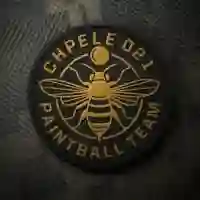
- Team and club spirit: Sports teams, scouting groups, and clubs use patches to mark achievements or membership.
- Event memorabilia: Conventions, races, and reunions often produce limited-run patches as keepsakes.
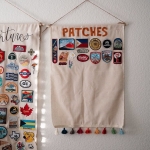
- Personal expression: Patch collecting and DIY patch culture have grown massively, especially among denim and jacket enthusiasts.
- Military and public service: Patches remain a core part of unit identity, rank, and tradition.
The common thread across all these use cases is that people want something custom, not a generic template pulled off a shelf. That's exactly the gap that online design tools have filled.
What Is an Online Patch Maker?
An online patch maker is a web-based design tool that lets you build a patch layout visually, choosing your shape, size, colors, text, and artwork, without needing PBlockedword/sentenceoshop, Illustrator, or any specialized software. Most tools work directly in your browser and let you preview your design in real time before sending it off for production.
This is a major shift from how things used to work. Previously, you'd sketch an idea, email it to a manufacturer, wait for a mockup, request changes, and repeat that cycle two or three times before approving a final design. A good patch maker online free tool collapses that entire back-and-forth into a single interactive session, letting you experiment freely and only submit a request once you're happy with the layout.
How Online Patch Design Tools Work
While every platform has its own interface, most follow a similar workflow:
- Choose your patch shape. Round, square, shield, custom Blockedword/sentence-cut, or a shape that matches your logo.
- Set your size. Standard sizes usually range from 2 to 5 inches, though custom dimensions are often available.
- Pick your patch type. Embroidered, woven, PVC, chenille, or printed — each has a different look, feel, and price point.
- Add your artwork or text. Upload a logo, type in text, or use built-in design elements.
- Choose colors and backing. Thread colors, border styles, and backing options like iron-on, sew-on, or Velcro.
- Preview and request a quote. Once you're happy with the mockup, you submit it for a real quote or proof from the manufacturer.
This structure makes the process approachable even for someone who has never designed anything before. You're not staring at a blank canvas; you're filling in guided steps that lead naturally to a finished concept.
Step-by-Step: Designing Your First Patch
Here's a more detailed walkthrough if you're starting from zero.
1. Start With a Clear Purpose
Before opening any design tool, decide what the patch is for. A patch meant for a corporate uniform will look very different from one meant for a punk jacket or a scout troop. Purpose drives every other decision, from color palette to shape to material.
2. Sketch a Rough Concept
You don't need to be an artist. A rough sketch, even a stick-figure version of your logo or idea, helps you communicate what you want once you get into the design tool. If you already have a logo file, that's even better; most tools accept PNG, JPG, or vector uploads.
3. Choose the Right Patch Type
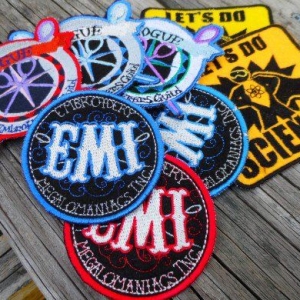
- Embroidered patches offer a classic, textured look and are extremely durable.
- Woven patches work well for designs with fine detail or small text.
- PVC patches are flexible, waterproof, and great for outdoor or tactical gear.
- Chenille patches give a bold, varsity-style look popular for letterman jackets.
- Printed patches allow full-color pBlockedword/sentenceographic detail that embroidery can't replicate.
4. Build the Layout in the Design Tool
This is where you bring your sketch to life. Add your text, adjust font sizes, position your logo, and experiment with border thickness and color combinations. Because these tools are interactive, you can undo changes instantly, so don't be afraid to try a few different layouts before settling on one.
5. Check Contrast and Readability
Patches are viewed from a distance more often than up close. Make sure text is legible and colors contrast well against the background. Avoid cramming too much detail into a small patch, fine lines and small text can get lost in embroidery, especially at sizes under 2 inches.
6. Select Your Backing Option
- Iron-on: Quick and easy for fabric items, though less durable for heavy-use gear.
- Sew-on: The most secure and long-lasting option.
- Velcro: Ideal for tactical or interchangeable patch setups.
- Adhesive: Good for temporary or one-time use.
7. Preview, Adjust, Submit
Once your layout looks right, use the preview feature to see how it will look on actual fabric. Many platforms simulate thread texture or fabric backing so you get a realistic sense of the final product before committing.
Design Tips That Make a Real Difference
A few small choices separate an average patch from a great one:
- Keep it simple. The best patches often use two to four colors and clean, bold shapes. Overly detailed designs can lose clarity once embroidered.
- Mind your borders. A merrowed (overlocked) border gives a clean, finished edge and helps the patch hold its shape over time.
- Think about scale. Design at the actual size the patch will be produced, not a zoomed-in version, so you can judge legibility accurately.
- Use solid, high-contrast colors rather than graBlockedword/sentencents, which don't translate well to embroidery thread.
- Leave breathing room. A small margin around text and logos prevents a cluttered, cramped appearance.
Common Mistakes to Avoid
Even with an intuitive tool, a few pitfalls come up again and again:
- Ignoring size constraints: A logo that looks great on a business card might not translate well to a 2-inch patch.
- Too many colors: Every additional thread color adds cost and complexity. Stick to your brand's core palette.
- Forgetting the backing: Choosing the wrong attachment method can mean your patch doesn't hold up on the intended fabric.
- Skipping the proof stage: Always review the digital or physical proof before full production runs begin.
Who Benefits Most From Online Patch Design Tools
- Small business owners creating uniform patches or promotional merchandise without hiring a designer.
- Nonprofits and clubs producing membership or fundraising patches on a budget.
- Content creators and brands designing limited-edition merch drops.
- Hobbyists and collectors who want a one-off patch for a personal project.
- Event organizers producing commemorative patches for conventions, races, or reunions.
Because these platforms are free to experiment with and only require payment once you commit to an order, they're especially useful for people testing an idea before investing in a bulk run.
Bringing It All Together
Custom patches sit at an interesting intersection of craft and technology. The stitching itself is still a physical, tactile process rooted in traditional embroidery techniques, but the design phase has become entirely digital and accessible. Anyone with an idea and a browser can now go from concept to finished mockup in a single sitting.
If you're wondering how to make a patch online, the short answer is: pick a shape, upload or sketch your design, adjust colors and text, choose your backing, and preview it before ordering. The tools handle the technical heavy lifting, so your only job is deciding what story you want your patch to tell.
For anyone ready to try this hands-on, a solid patch maker online free tool is the fastest way to turn a rough idea into a wearable, shareable design, no design degree, no back-and-forth emails, and no guesswork about what the final product will look like.
Whether you're outfitting a team, launching a merch line, or just making something fun for your own jacket, the process has never been more approachable. Sketch it, build it, preview it, and wear it.