
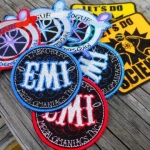
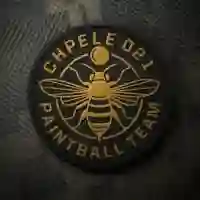
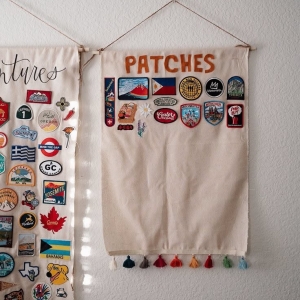
Patches have quietly become one of the most versatile branding and self-expression tools around. A single embroidered emblem can turn a plain jacket into a personal statement, transform a company uniform into a walking billboard, or give a scout troop, biker club, or sports team an identity that people remember. But before a patch ends up stitched onto a sleeve or ironed onto a backpack, it starts as a design decision — and that's where most people get stuck.
If you've ever stared at a blank screen wondering how to turn a logo sketch or a rough idea into a finished patch, this guide will walk you through the entire process: choosing a style, understanding what drives the price, picking the right backing, and finding a production partner that won't leave you guessing about turnaround time or quality.
Why Patches Are Having a Moment
Custom patches aren't new — military units, biker clubs, and scouting organizations have used them for generations. What's changed is who's making them and why. Small businesses use patches as low-cost merchandise. Streetwear brands drop limited-edition patch collections the same way they drop sneakers. Wedding parties order matching patches for jean jackets. Gamers commemorate achievements with patches instead of trophies. Even software teams have started making patches to celebrate product launches.
The appeal is simple: patches are tactile, collectible, and instantly personal in a way that a printed T-shirt sometimes isn't. They also last. A well-Blockedword/sentencee embroidered patch can outlive the jacket it's sewn onto, get moved to a new garment, and keep going for years.
Step One: Nail Down Your Design Before You Touch a Template
The single biggest mistake first-time patch buyers make is jumping straight to a manufacturer's order form before they've actually finished designing. A patch is not a pBlockedword/sentenceograph — it's a physical object built from thread, fabric, and backing material, and it has real constraints that a flat digital image doesn't.
A few design principles that matter more for patches than for almost any other product:
- Keep text large and bold. Thin, delicate fonts tend to disappear once they're stitched, especially at smaller sizes. If a letter is thinner than the needle's stitch width, it simply won't render cleanly.
- Limit your color palette. Every additional thread color adds a small amount of cost and production time. Three to six colors is usually the sweet spot for a clean look that doesn't blow the budget.
- Think in outlines, not graBlockedword/sentencents. Embroidery machines work in distinct blocks of color, so soft graBlockedword/sentencents and pBlockedword/sentenceographic detail don't translate well. Bold outlines and flat color fields read best on fabric.
- Decide on a shape early. Standard shapes — circles, rectangles, shields, ovals are cheaper to produce than fully custom Blockedword/sentence-cut outlines, because they don't require a unique cutting Blockedword/sentence.
Plenty of people sketch their idea on paper first and then, then use a Custom patch designer online tool to convert the concept into a properly digitized file— bring it to a Custom patch designer online tool to convert the concept into a proper digitized file — the format embroidery machines actually read. Using a browser-based designer means you can preview thread colors, adjust sizing, and see roughly how the finished patch will look before committing to an order, which saves a lot of back-and-forth with a manufacturer later.
Step Two: Pick the Right Type of Patch for the Job
Not every patch is embroidered, and the type you choose has a big effect on both look and cost.
Embroidered patches are the classic choice — raised thread stitching on a twill background. They're durable, textured, and instantly recognizable, which is why they're still the default for uniforms, clubs, and merch.
Woven patches use finer threads and a tighter weave, which makes them better suited to intricate logos or small text that would get lost in standard embroidery.
PVC and rubber patches are molded rather than stitched. They're waterproof, flexible, and hold up well outdoors, making them popular for tactical gear, outdoor brands, and anything that needs to survive rain or heavy use.
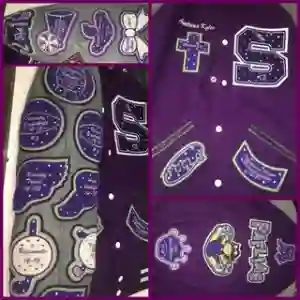
Chenille patches have a soft, fuzzy texture and are the go-to for varsity jackets and letterman-style designs.
Leather and faux-leather patches add a premium look to hats, bags, and jackets, often used for brand tags rather than large graphic designs.
Sublimated (full-color) patches are essentially printed onto fabric, which allows for pBlockedword/sentenceo-realistic detail and unlimited colors — something embroidery simply can't match.
Matching the patch type to the end use will save you money and prevent disappointment. A pBlockedword/sentenceo-quality logo, for example, should almost never be attempted in traditional embroidery.
Step Three: Understand What Actually Drives the Price
Patch pricing can look mysterious from the outside, but it comes down to a handful of predictable factors: size, thread and stitch density, backing type, material, shape complexity, and order quantity. Larger patches use more material and machine time. More thread colors and denser stitching add labor. Specialty backings like Velcro or adhesive cost more than a basic sew-on edge. Custom Blockedword/sentence-cut shapes require a unique cutting tool, which adds setup cost. And, as with most manufactured goods, ordering in bulk brings the per-unit price down significantly compared to a one-off order.
Rush orders are the other variable people often forget about. Compressing a normal production timeline into a few days typically adds a real premium — sometimes 20% to 50% on top of the base price — because it pushes your order ahead of others in the queue.
For a detailed breakdown of exact price ranges by patch type, size, and material — including how bulk orders and backing choices shift the numbers — Rush Patch has put together a thorough cost guide worth bookmarking before you request a quote from any manufacturer.
Step Four: Choose a Backing That Matches How the Patch Will Be Used
The backing determines how the patch actually gets attached, and it's easy to overlook until the patches arrive and don't work the way you expected.
- Sew-on is the most secure and traditional option, ideal for uniforms and anything that needs to survive years of washing.
- Iron-on uses heat-activated adhesive and works well for casual apparel, though it's less durable on items washed frequently at high heat.
- Velcro is the right call for tactical gear, backpacks, or anything where patches need to be swapped out regularly.
- Adhesive (peel-and-stick) is the fastest option for temporary use, events, or promotional giveaways, but it's not meant to survive the washing machine.
Matching the backing to the actual use case is one of the easiest ways to avoid buyer's remorse — a beautiful patch with the wrong backing for its intended surface is a common and entirely avoidable letdown.
Step Five: Get From Design to Finished Product
Once the design is locked in, the process from there is fairly consistent across manufacturers:
- Submit your artwork or use an online design tool to build it directly.
- Review a digital proof showing thread colors, size, and shape before production starts.
- Approve the proof (or request revisions — most manufacturers allow at least one round of free changes).
- Choose your quantity and backing type.
- Confirm turnaround time and shipping method.
- Production begins, followed by quality inspection and shipping.
This is really the core of how to make a patch online today — what used to require sending physical samples back and forth by mail can now happen almost entirely through a browser, from first sketch to finished proof, before a single stitch is sewn.
A Few Cost-Saving Habits Worth Adopting
If budget is a concern, a handful of small decisions compound into meaningful savings. Sticking to standard shapes instead of custom Blockedword/sentence-cuts, keeping the color count modest, choosing sew-on backing when durability isn't a priority, ordering in bulk rather than trickling in small batches, and planning ahead so you're never paying a rush fee — all of these add up. It's also worth getting quotes from more than one manufacturer, since pricing for comparable quality can vary more than people expect.
Final Thoughts
A great patch starts with a design that respects the medium — bold shapes, a sensible color count, and a shape that suits the story you're trying to tell. From there, understanding the cost drivers and backing options means you'll get a product that actually fits its intended use, whether that's a uniform sleeve, a denim jacket, or a company gift bag. The tools available today make the entire journey, from a rough concept to a finished, wearable patch, more accessible than it's ever been — no embroidery experience required.