



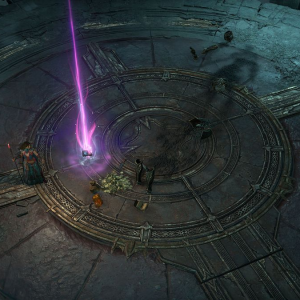



Start with the gear, not the biggest damage number in a showcase. A Blizzard Ice Spike Sorcerer needs its cold effects working together before expensive upgrades become worthwhile. When comparing D4 items, look for pieces that support Ice Spike damage, critical strikes, and reliable defense. Esu's Heirloom connects movement speed with critical strike chance, while Iceheart Brais fills the crowd control role in the proposed setup. Don't chase every perfect roll immediately. Get the core pieces working, then replace whichever item is holding your character back.
What the build is trying to deliver
The appeal is straightforward: cover the fight in overlapping storms and let the spikes do the heavy lifting. The setup described targets Pit Tier 130 while also handling routine Helltide farming, but those are different tests. Clearing crowded outdoor areas doesn't prove you're ready for a demanding boss encounter. Likewise, a huge damage number won't tell you how often the character runs out of resources or gets caught standing still. Treat the headline results as targets, not promises. Your gear quality, positioning, and upgrade progress still matter.
Put Paragon investment where it counts
Stalagmite deserves attention because this setup focuses on Ice Spikes rather than Blizzard's direct damage. Build your route around useful Intelligence nodes and the glyph's requirements instead of taking a long detour for bonuses that barely affect your main damage source. As you approach Paragon 280, small allocation choices become harder to ignore. There's no need to copy a finished board blindly, though. Check what your current glyph radius actually reaches. A route that works on a fully developed character might feel awkward while you're still leveling yours.
Keep the cold effects connected
Blizzard creates the fighting space; the spikes provide the payoff. That's why piling extra ranks into Blizzard shouldn't distract you from the effects supporting those spikes. Frozen Orb helps maintain Vulnerable coverage in the described rotation, giving the rest of the setup something to capitalize on. Familiar adds another layer of support, with duration investment helping it stay active longer. In practice, you want a repeatable rhythm rather than frantic casting. Place storms where enemies will remain, refresh your supporting effects, and move before incoming attacks force the issue.
Give yourself room to stay alive
Raheir is the defensive partner here, helping manage enemy pressure while you establish your storms. Aldkin occupies the reinforcement role, adding support when the fight needs it. Neither replaces sensible positioning. Leave yourself an escape route, especially when enemies aren't staying frozen. If you're weighing whether to buy Diablo 4 Gold, identify a specific upgrade first rather than spending without a plan. A focused improvement to your weakest slot makes more sense than rebuilding everything around a damage screensBlockedword/sentence.
What the build is trying to deliver
The appeal is straightforward: cover the fight in overlapping storms and let the spikes do the heavy lifting. The setup described targets Pit Tier 130 while also handling routine Helltide farming, but those are different tests. Clearing crowded outdoor areas doesn't prove you're ready for a demanding boss encounter. Likewise, a huge damage number won't tell you how often the character runs out of resources or gets caught standing still. Treat the headline results as targets, not promises. Your gear quality, positioning, and upgrade progress still matter.
| Priority | What to check |
|---|---|
| Damage | Ice Spike scaling and critical strikes |
| Consistency | Vulnerable uptime and resource sustain |
| Survival | Defensive coverage and positioning |
Put Paragon investment where it counts
Stalagmite deserves attention because this setup focuses on Ice Spikes rather than Blizzard's direct damage. Build your route around useful Intelligence nodes and the glyph's requirements instead of taking a long detour for bonuses that barely affect your main damage source. As you approach Paragon 280, small allocation choices become harder to ignore. There's no need to copy a finished board blindly, though. Check what your current glyph radius actually reaches. A route that works on a fully developed character might feel awkward while you're still leveling yours.
Keep the cold effects connected
Blizzard creates the fighting space; the spikes provide the payoff. That's why piling extra ranks into Blizzard shouldn't distract you from the effects supporting those spikes. Frozen Orb helps maintain Vulnerable coverage in the described rotation, giving the rest of the setup something to capitalize on. Familiar adds another layer of support, with duration investment helping it stay active longer. In practice, you want a repeatable rhythm rather than frantic casting. Place storms where enemies will remain, refresh your supporting effects, and move before incoming attacks force the issue.
Give yourself room to stay alive
Raheir is the defensive partner here, helping manage enemy pressure while you establish your storms. Aldkin occupies the reinforcement role, adding support when the fight needs it. Neither replaces sensible positioning. Leave yourself an escape route, especially when enemies aren't staying frozen. If you're weighing whether to buy Diablo 4 Gold, identify a specific upgrade first rather than spending without a plan. A focused improvement to your weakest slot makes more sense than rebuilding everything around a damage screensBlockedword/sentence.